Crafting Premium Mullein Leaf Oil: A Comprehensive Tutorial

Envision yourself encased in the comforting warmth of nature's wellness, the quintessence of earthy mullein leaves merged into a rich, golden oil. We aim to help you actualize this vision today by guiding you through the process of preparing mullein leaf oil, a traditional solution with numerous applications. Excited to start? So are we!
Understanding Mullein Leaf Oil
Before we immerse ourselves in the creation process, it's crucial to comprehend what we're making.
Demystifying Mullein
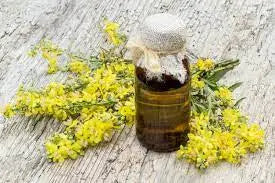
Mullein is a versatile flora characterized by its soft leaves and towering, yellow floral spikes. This plant is a common sight in meadows and along roadsides globally. Although its name may seem unfamiliar, this plant has a long history of serving medicinal needs.
The Health-Enhancing Properties of Mullein Leaf Oil
Mullein leaf oil is an abundant source of health benefits. It's frequently applied for respiratory complications, ear pain, and skin conditions due to its anti-inflammatory, antibacterial, and antiviral attributes. With some knowledge about mullein and its advantages, we're ready to accumulate the essentials for our task!
Embarking on the Journey to Make Mullein Leaf Oil
Assembling Your Materials
Firstly, let's gather the necessary tools: fresh mullein leaves, a carrier oil (olive or coconut oil are fine choices), a glass jar, a cheesecloth or strainer, and a dark bottle for preserving the oil. Once you have all these items at hand, it's time to focus on the main ingredient - the mullein leaves.
Choosing and Harvesting Mullein Leaves

The ideal mullein leaves for oil are those that are healthy and green. Be sure to pluck the leaves carefully to keep the plant in good condition. Armed with your leaves, we're now set for the next phase.
Formulating Mullein Leaf Oil: A Stepwise Tutorial
Step 1: Purification and Drying of Leaves
Rinse the leaves gently under flowing water. After washing, dab them dry or leave them to air dry. It's essential to ensure no water content in our oil!
Step 2: Infusing the Oil
Subsequently, arrange the leaves in your glass jar and add the carrier oil, ensuring all leaves are covered. Seal the jar and position it in a sunlit, warm location. The alchemy begins!
Step 3: Filtering and Preserving the Oil
After 2-4 weeks, the oil should be sufficiently infused. Strain the oil using a cheesecloth into your dark storage bottle. Presto! You've successfully crafted your mullein leaf oil!
Strategies for Impeccable Mullein Leaf Oil

Optimum Harvest Time for Mullein
The perfect time for harvesting is in the late morning, once the dew has evaporated. This not only minimizes mold risk but also enriches the oil quality.
Regulating Infusion Temperature
While sunlight naturally warms the oil aiding in infusion, excessive heat might degrade the oil. Keep an eye on the temperature and reposition the jar if it gets too hot.
Effective Preservation Methods
To extend the oil's longevity, store it in a cool, dark place. Dark glass bottles are perfect for guarding against light-induced degradation.
Conclusion
Fabricating mullein leaf oil is akin to creating a masterpiece on nature's canvas. It's a straightforward process that results in a versatile and beneficial product. With our exhaustive guide, you're now ready to dive into this ancient craft and unveil the natural wellness hidden in mullein leaves.
Frequently Asked Queries
Can I employ dried mullein leaves to produce the oil?
Absolutely, dried leaves can be used, although fresh leaves are typically favored for their potency.
What's the shelf-life of mullein leaf oil?
If properly stored, the oil can be preserved for up to a year.
Is it safe to apply mullein leaf oil directly to my skin?
Yes, but it's always advisable to perform a patch test first to rule out any potential allergic reactions.
What if my mullein oil turns cloudy or moldy?
In the event of apparent spoilage, it's best to dispose of the oil.
Can I substitute olive or coconut oil with other oils?
Certainly, other carrier oils like almond or jojoba oil can also be employed.


